Land Rover Defender: Bolt and Nut Identification

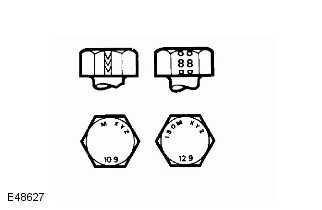
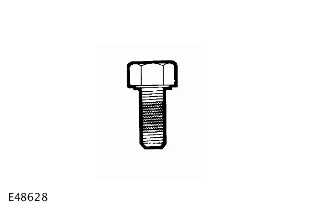
An ISO metric bolt or screw made of steel and larger than 6 mm in diameter can be identified by either of the symbols ISO M or M embossed or indented on top of the bolt head.
In addition to marks identifying the manufacturer, the top of the bolt head is also marked with symbols indicating the strength grade e.g. 8.8, 10.9, 12.9, 14.9. Alternatively, some bolts and screws have the M and strength grade symbol stamped on the flats of the hexagon.
ENCAPSULATED ('PATCHED') BOLTS AND SCREWS

Encapsulated ('patched') bolts and screws have a thread locking agent applied to the threads during manufacture.
Most thread locking agents are colored, the band of color extending for 360º around the thread. Some locking agents however, are neutral in color and may not be so easily identified apart from a slightly darker area of thread where the locking agent has been applied. The locking agent is released and activated by the tightening process and is then chemically cured to provide the locking action.
SELF-LOCKING BOLTS AND SCREWS

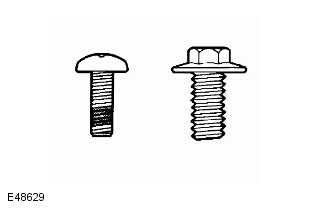
Unless stated in a specific repair procedure, self-locking bolts and screws i.e. nylon patched or trilobular thread can be re-used provided that resistance is felt when the locking portion enters the female thread.
Nylon patched bolts and screws have a locking agent either applied to, or inserted in the threaded portion. They are identified by the presence of a colored section of thread extending approximately 180º around the thread or by a colored plug inserted into the bolt.
Trilobular bolts have a special thread form which creates a slight interference with the thread of the hole or nut into which it is screwed.
CAUTION: Do Not re-use self-locking fasteners in critical locations e.g. drive plates/flywheel or engine bearings. Do not install non self-locking fasteners where a self-locking fastener is specified.
Trilobular bolts should not be used as a substitute for patched bolts.
NUT IDENTIFICATION

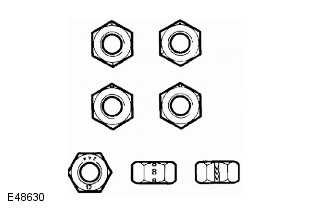
A nut with an ISO metric thread is marked on one face or one of the hexagonal flats with the strength grade symbol 8, 12, 14. Some nuts with the strength grade 4, 5 or 6 are also marked and some have the metric symbol M on the hexagonal flat opposite the strength grade marking.
A clock face system is sometimes used as an alternative method of indicating the strength grade. The external chamfers or a face of the nut is marked in a position relative to the appropriate hour mark on a clock face to indicate the strength grade.
A dot is used to locate the 12 o'clock position and a dash to indicate the strength grade. If the grade is above 12, two dots identify the 12 o'clock position.
When tightening a slotted or castellated nut, never loosen it to insert a split pin except where specified as part of an adjustment procedure. If difficulty is experienced in correctly positioning the slot, alternative washers or nuts should be selected.
Where a nut is tightened to adjust or maintain bearing pre-load, the tightening procedure must be adhered to.
SELF-LOCKING NUTS
Unless stated otherwise, self-locking nuts once removed must be discarded and new nuts of the same type and strength grade installed.
AIR SUSPENSION
Always make sure that suitable eye protection is worn when working on the air suspension system.

