
Land Rover Defender: Warning Triangle
WARNING TRIANGLE - PART NUMBER: VPLVC0060
REMOVAL AND INSTALLATION
WARNING: Accessories which are not correctly installed can be dangerous. Read the instructions carefully prior to installation. Comply with instructions at all times. If in doubt, contact your nearest approved retailer.
NOTES:
- This procedure contains some variation in the illustrations depending on the vehicle specification, but the essential information is always correct.
- This procedure contains illustrations showing certain components removed to provide extra clarity.
INSTALLATION
1.
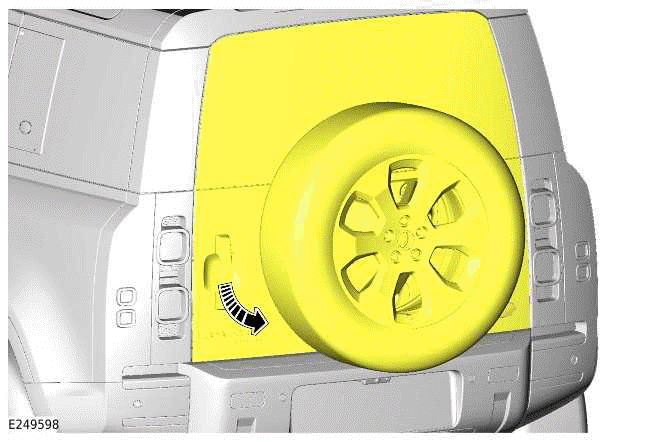
Open the tailgate.
2.

Identify the plastic storage compartment on the inside of the tailgate.
3.
NOTE: Turn the screws outwards.

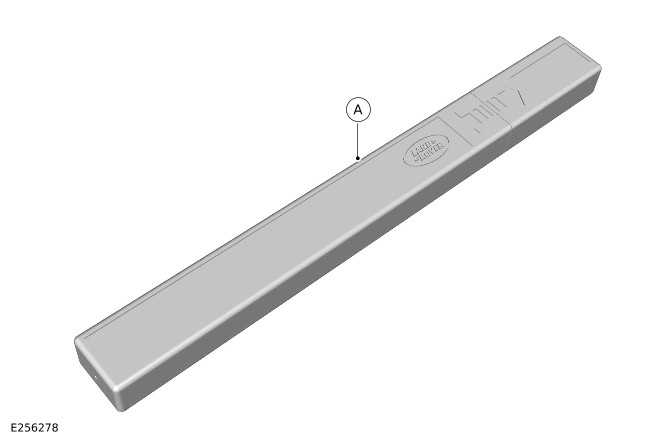
Remove the warning triangle storage compartment cover. Insert the warning triangle (A) into the housing as illustrated.
4.
NOTE: Turn the screws inwards.

Replace the warning triangle storage compartment cover as illustrated.
READ NEXT:
 First Aid Kit
FIRST AID KIT - PART NUMBER: VPLCS0319
REMOVAL AND INSTALLATION
WARNING:
Accessories which are not properly installed can be dangerous. Read the
instructions carefully prior to fitting.
When fitting
Jump Lead
JUMP LEAD - PART NUMBER: VPLVV0090
REMOVAL AND INSTALLATION
WARNINGS:
Accessories which are not properly fitted can be dangerous. Read the
instructions carefully prior to fitting.
Comply with ins
Snow Chains
SNOW CHAINS - PART NUMBER: VPLEW0140
REMOVAL AND INSTALLATION
WARNING:
Accessories which are not correctly installed can be dangerous. Read the
instructions carefully prior to
installation. Comply wi
SEE MORE:
Automatic Transmission
SPECIFICATIONS
Lubricants
CAUTION:
Make sure the correct Automatic Transmission Fluid (ATF) is used as specified.
Use of any other fluids may
result in a malfunction or failure.
Maintenance
Torque Specifications
NOTE:
Numbers with a green background are a single use component.
COMPONENT TORQUE
Installation
1.
NOTE:
Complete install step 2 to 5 before tightening the 8 armature bolts.
Loosen the 8 armature bolts to assist the installation of the front
undershield support bar (A1).
2.
NOTE:
This step requires the aid of another technician.
Align and install the front undershield support bar (A1).
Al
© 2010-2025 Copyright www.lrdefender.org
